Meal Prep

Rant: 5 Delicious and Satisfying Plant-Based Meals

A full leaf of Kale in the centre on a counter top surrounded by round slices of carrots and cucumer, half moon slices of radish, and lemon

What are some of the benefits of incorporating more plant-based meals into your diet?

Incorporating more plant-based meals into your diet can have numerous health benefits, including a lower risk of heart disease, and diabetes. Plant-based diets are also typically higher in fiber, which can help with digestion and satiety, and they can be more environmentally sustainable than meat-based diets.

I've been on a mission to incorporate more plant-forward meals into my diet and today, I'm going to share with you some ideas for delicious and satisfying plant-based meals that you can easily whip up on any weeknight. Whether you're a seasoned vegan or just looking to eat a little more plant-based, these meals check all the boxes.

First up, let's talk about stir-fry. This is one of my go-to meals for busy weeknights because it's quick, easy, and endlessly customizable. To make a plant-based stir-fry, start by sautéing some garlic, ginger, and vegetables of your choice in a wok or large skillet. I like to use a mix of bell peppers, onions, broccoli, and snap peas, but you can use whatever veggies you have on hand. Once the veggies are tender-crisp, add in some tofu or tempeh for protein, and your choice of sauce. I like to use a combination of soy sauce, hoisin sauce, and chili garlic sauce. Serve over rice or noodles, and you've got a delicious plant-based meal in under 30 minutes. If you do not like tofu and want to get a healthy portion of protein an alternative I use are edamame and maybe even sprinkle hemp seeds at the very end before mixing or serve over cooked quinoa.

What about tacos? I would imagine lots of pant-based options using tacos. What are some of the best plant-based taco toppings?

Who doesn't love tacos? And you are correct, the great thing about tacos is that they're easily adaptable to a plant-based diet. Some of the best plant-based taco toppings include avocado, salsa, diced tomatoes, shredded lettuce or cabbage, chopped cilantro (if you like that if not I substitute with parsley), and lime juice. Other options could be pickled onions, jalapeños, or vegan sour cream.

For plant-based tacos, start by sautéing some onion and garlic in a skillet. Then, add in some crumbled tofu or tempeh and your choice of taco seasoning. Cook until the tofu or tempeh is heated through and coated in the seasoning. Serve in tortillas with your favourite taco toppings, like avocado, salsa, cilantro, and lime.

Can salads be filling enough to be a main course? What are some ingredients that can make a salad more substantial?

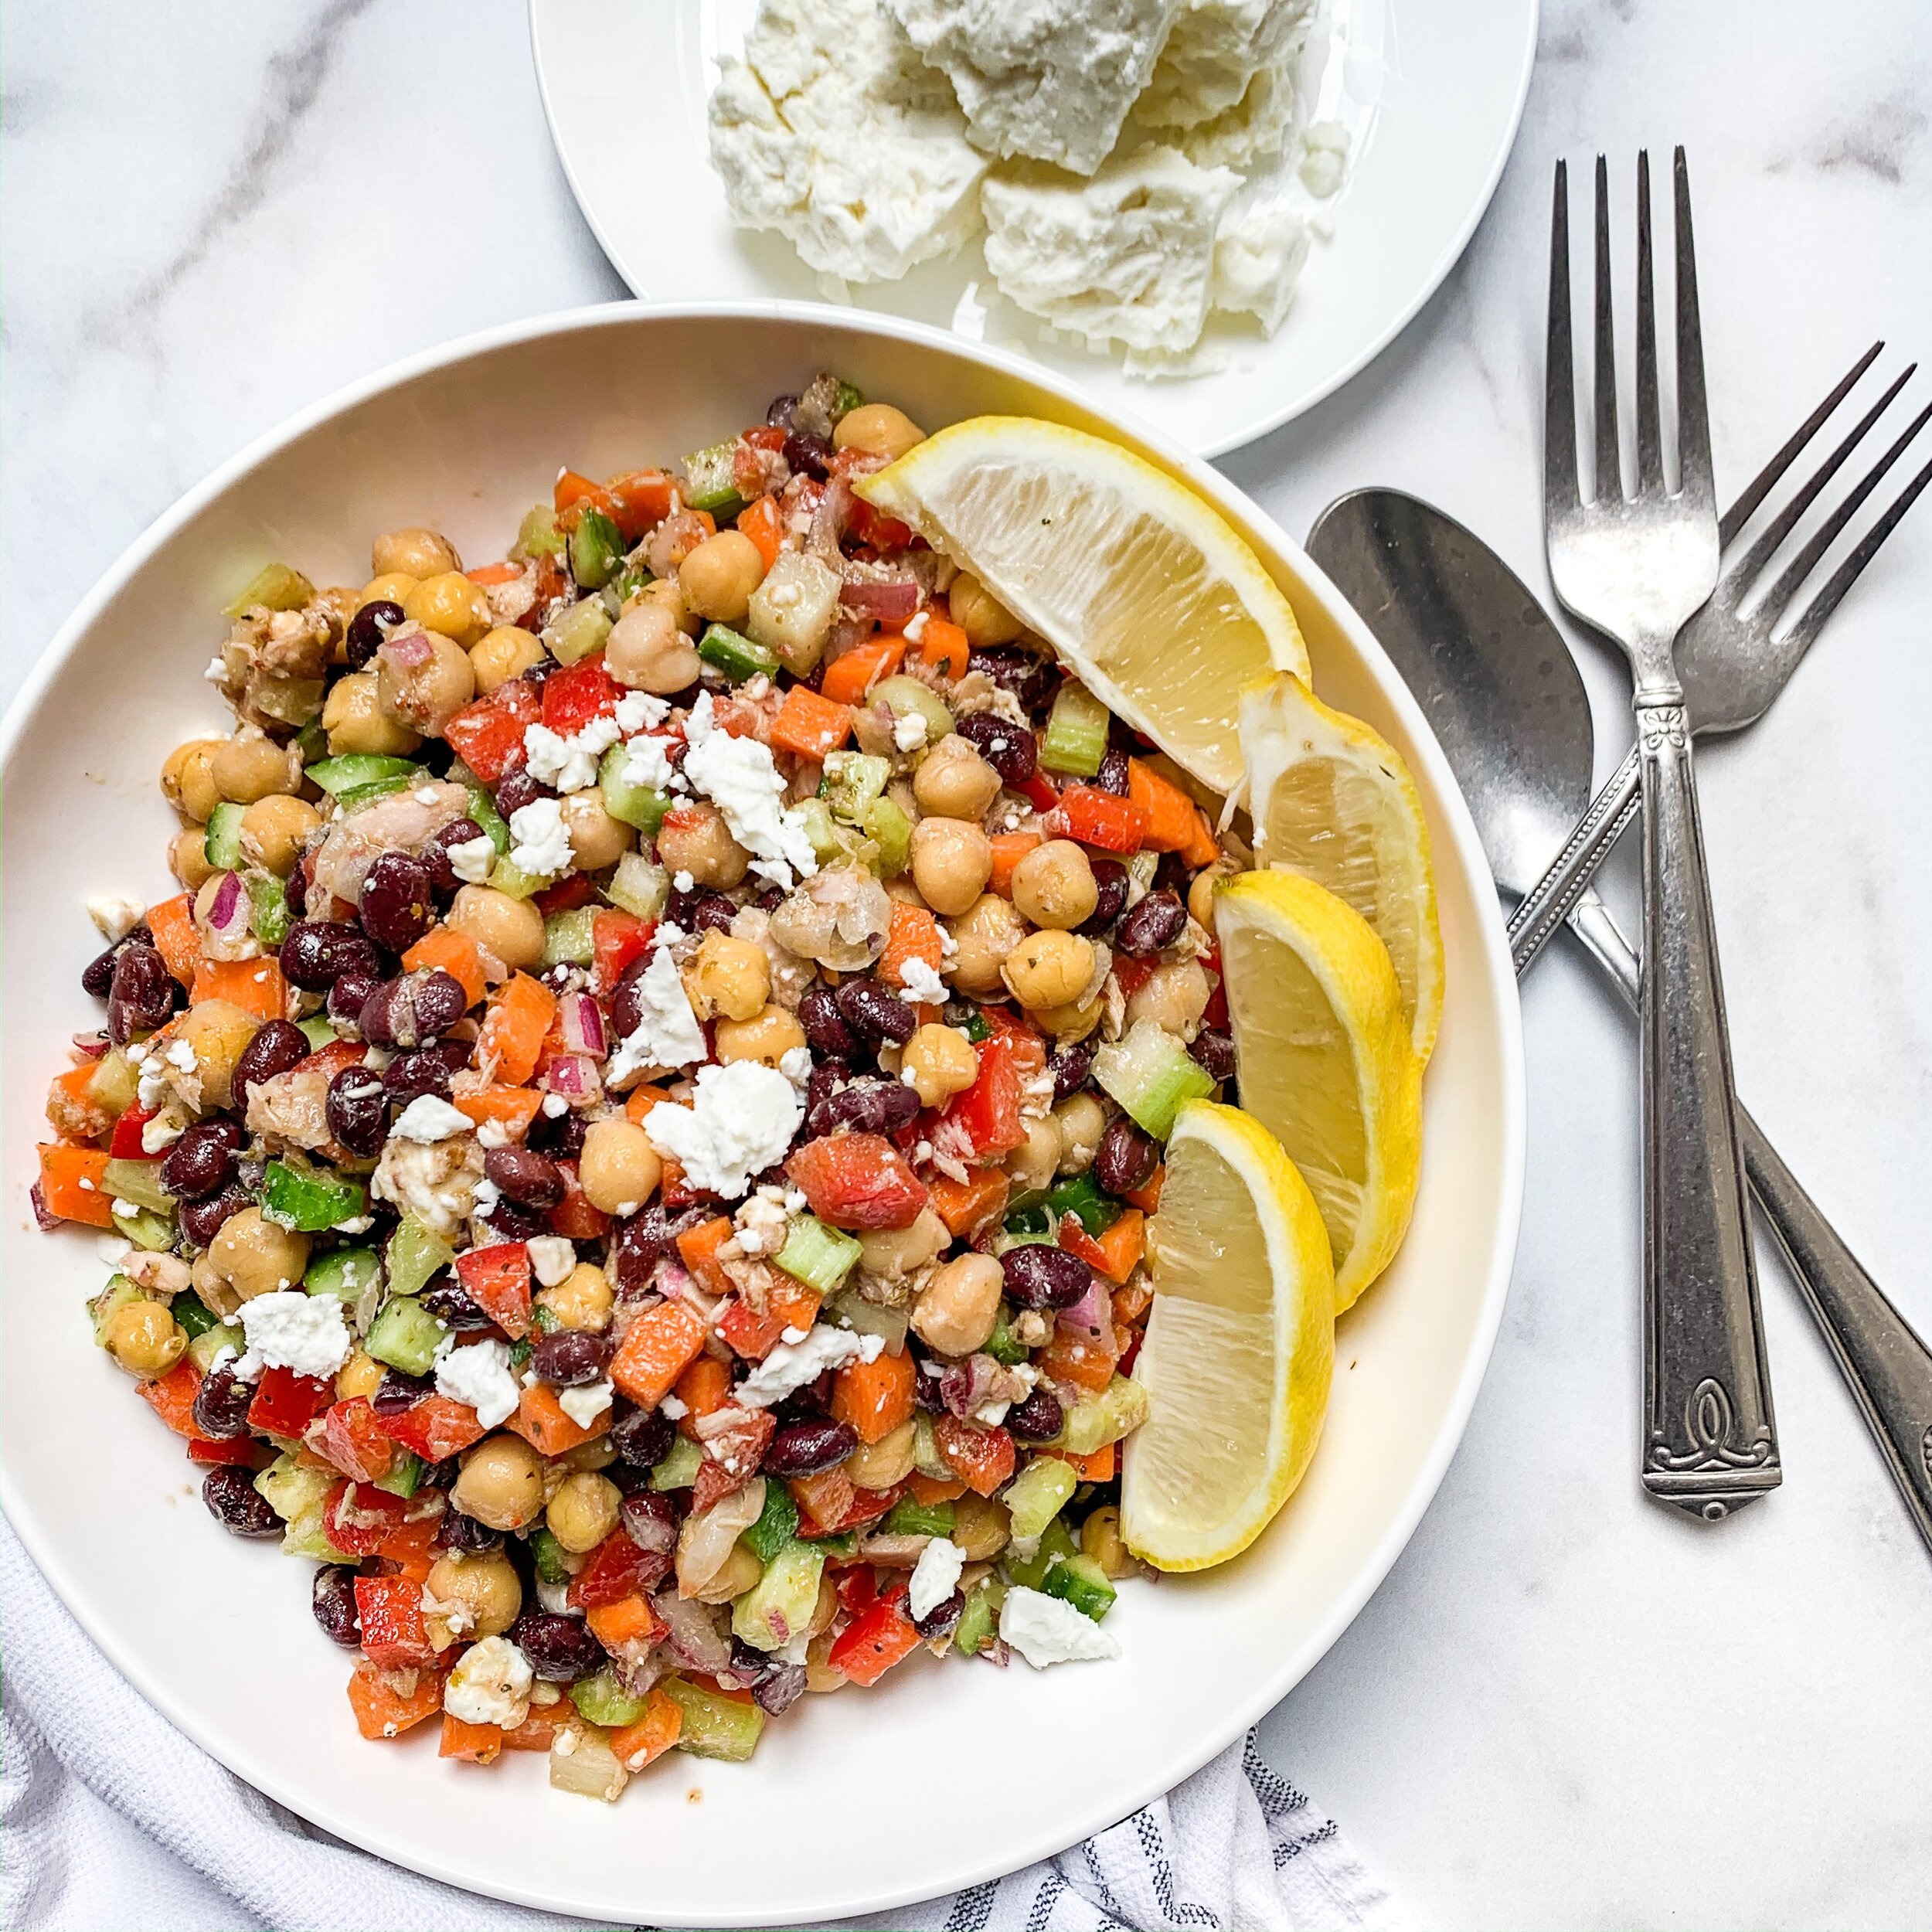
Another great weeknight meal is a hearty salad. Don't think of salads as just a side dish - with the right ingredients, they can be a satisfying and filling main course. Start with a bed of greens, like spinach or kale, and add in some roasted vegetables, like sweet potatoes or beets. Then, add in some protein, like chickpeas or quinoa, and top with a flavuorful dressing, like a tahini lemon dressing or a balsamic vinaigrette. You'll be surprised at how filling and satisfying a big salad can be.

What are some of the best plant-based burger options on the market?

There are many great plant-based burger options on the market today, including Beyond Meat, Impossible Foods, and Morningstar Farms. Other options include Trader Joe's Plant-Based Burgers, Gardein Ultimate Beefless Burgers, and Dr. Praeger's Perfect Burger.

If you're looking for something a little more substantial, how about a plant-based burger? There are so many great options on the market these days, but you can also make your own at home. Try making a burger patty out of cooked quinoa, black beans, and spices. Then, top with your favorite burger toppings, like avocado, tomato, and lettuce. Serve with a side of roasted sweet potato fries, and you've got a satisfying and delicious plant-based meal.

How can you make a simple and flavourful plant-based pasta dish at home?

You can still enjoy pasta on a plant-based diet! Start by cooking your favorite pasta according to the package directions. Then, sauté some garlic, onion, and vegetables of your choice in a skillet. I like to use a mix of mushrooms, spinach, and sun-dried tomatoes. Once the veggies are cooked through, toss with the cooked pasta and a simple sauce made from olive oil, lemon juice, and red pepper flakes. Top with some fresh basil and vegan parmesan cheese, and you've got a delicious plant-based pasta dish that will have you going back to the pot for seconds.

So there you have it - five delicious and satisfying plant-based meals that are perfect for weeknight dinners. Whether you're a seasoned vegan or just looking to incorporate more plant-based meals into your diet, these meals are sure to please. By using a variety of colorful vegetables, healthy protein sources, and flavorful sauces and spices, you can create plant-based meals that are just as satisfying and delicious as their meat-based counterparts. So next time you're looking for a quick and easy weeknight meal, try out one of these plant-based options and enjoy all the health benefits that come with a more plant-forward diet.

Print Friendly and PDF

Recipe: Quick Chunky Beef Chili

Over the years I’ve made many pots of chili but this quick and chunky chili recipe is my absolute favourite. I like to add fresh jalapeños, cheese, sour cream, green onion, and forget the spoon just use crispy tortilla chips instead!

Frequently Asked Questions:

CAN YOU FREEZE CHILI?

Yes, chili is the perfect freezer meal. Divide the cooked chili it into single portions and let it cool. Label the container with the contents and date, then transfer to the freezer. You can keep your chili in the freezer for about three months.

To reheat, simply let the chili thaw in the refrigerator over night and reheat in a pot over low heat, adding water if needed, until warm, or microwave on high for 2 minutes.


HOW LONG SHOULD YOU COOK CHILI?

You’ll want to let this chili simmer for a minimum of 30 minutes, but it’s something that you can leave simmering gently for up to a couple of hours. Chili is one of those dishes that tastes better the longer it cooks. If you do plan to let your chili simmer for a longer period of time, make sure to cover the pot with a lid so it doesn’t dry out. Check it occasionally to make sure all the liquid hasn’t evaporated. If it has, simply add a little water or beef broth.

Quick Chunky Beef Chili

Prep Time 5 minutes
Cook Time 30 minutes
Total Time 35 minutes
Author Mary Mammoliti | Kitchen Confession

Ingredients

1 1/2 pound lean ground beef
2 tablespoon olive oil
1 medium onion chopped
2 tablespoons tomato paste
1 red bell pepper, diced
1 teaspoon Worcestershire sauce
1 teaspoon soy sauce
1 1/2 teaspoons unsweetened cocoa powder
2 tablespoons chili powder
1 teaspoon garlic powder
1 teaspoon ground cumin
1 teaspoon smoked paprika
1/2 teaspoon cayenne pepper, optional
1 (19 fl oz/540 ml) can red kidney beans, drained & rinsed
1 (19 fl oz/540 ml) can pinto beans, drained & rinsed
1 (28 fluid ounce) can fire-roasted diced tomatoes with juices
1 cup beef broth (add more if you like)
Salt & pepper to taste

Toppings (optional)

Shredded cheddar cheese
Sour cream 
Sweet Potato Tortilla Chips

Instructions

  1. Add olive oil to a large pot over medium-high heat.

  2. Add the beef to the pot and cook for 5 minutes, breaking it up as you go, until brown.

  3. Pour in the onion and red bell pepper and sauté for 5 minutes or until softened.

  4. Stir in the tomato paste, Worcestershire sauce, soy sauce and stir until tomato paste has coated the beef mixture.

  5. Add the beans, diced tomatoes, beef broth, cocoa powder, chili powder, garlic powder, cumin, paprika, and cayenne pepper.

  6. On high heat bring the ingredients to a gentle boil, reduce the heat, cover leaving a slight opening and let it simmer for 30 minutes, stirring occasionally.

  7. Taste and add more salt & pepper if needed, serve with desired toppings and enjoy.

Print Friendly and PDF

Recipe: Grilled Mushroom Ricotta Sandwich

It’s the first day of school and I’m sure there were tears shed, parents rejoicing and teachers settling in for another year.

So let’s Celebrate OR Eat Your Emotions (whichever one works for you 😁)⁣⁣

Try my Grilled Mushroom Ricotta Sandwich! This would be the Italian relative to the North American Grilled Cheese.⁣⁣

PHOTO DESCRIPTION: A golden brown sliced sandwich filled with creamy white ricotta cheese and caramelized mushrooms. The bread is stacked and a few crumbs and a dollop of ricotta cheese give the picture a sense of imminent consumption.

PHOTO DESCRIPTION: A golden brown sliced sandwich filled with creamy white ricotta cheese and caramelized mushrooms. The bread is stacked and a few crumbs and a dollop of ricotta cheese give the picture a sense of imminent consumption.

Grilled Mushroom Ricotta Sandwich

Prep time: 5 minutes
Cook time: 10 minutes
Total time: 15 minutes
Servings: 1
Author: Mary Mammoliti / Kitchen Confession

INGREDIENTS 

  • Kosher salt⁣

  • 1 small onion thinly sliced

  • 4 mushrooms thinly sliced

  • 1 tablespoon extra-virgin olive oil⁣

  • Oregano to taste

  • Ricotta cheese

  • 2 slices of crusty bread (sour dough, whole wheat)

INSTRUCTIONS

  1. On medium- high heat sauté your sliced mushrooms, a small sliced onion, some salt, pepper, and oregano in some EVOO and cook that down until the onions are soft and the mushrooms are golden (about 5 -7 minutes) pour into a bowl and set aside.⁣⁣

  2. Wipe down the pan and toast two slices of crusty bread (sourdough, whole grain etc) and lightly butter one side of each slice of toast. ⁣⁣

  3. Place the buttered side down top with a few generous scoops fresh ricotta cheese, top with the sautéed mushrooms and onions, cap it off with the second slice of toast (buttered side out. ⁣⁣

  4. Place on the hot pan and grill for a minute, flip, and cook for an additional minute. ⁣⁣

  5. Remove from the pan, cut in half. Take a giant bite and let the excess spill out and down your face. Don’t worry I won’t tell if you won’t 😉

Print Friendly and PDF

Recipe: Lite Balsamic Vinaigrette

I love a good balsamic vinegar and if I could I would add a little into every dish I make. ⁣

The slight sweetness you get from the juice of “grape must” (in Italian, “mosto”), or the hint of oak from aging the “mosto” in wood barrels are the reasons I can’t get enough of it. ⁣

How to Buy a Good Balsamic Vinegar? Which balsamic vinegar is best for salad? Should balsamic vinegar be refrigerated?⁣

You know I live for food talk so If you want these questions answered or have a question of your own add it in the comments of my Instagram and let’s talk 😁⁣

For now I’ll leave you with the recipe to my Lite BALSAMIC VINAIGRETTE⁣

PHOTO DESCRIPTION: Rich brown balsamic vinaigrette with visible herbs ready to spread on your salad of choice contained in a clear jar. A slight spill and spoon lay to the right of the jar on a white washed wooden table.

PHOTO DESCRIPTION: Rich brown balsamic vinaigrette with visible herbs ready to spread on your salad of choice contained in a clear jar. A slight spill and spoon lay to the right of the jar on a white washed wooden table.

Lite Balsamic Vinaigrette

Prep time: 5 minutes
Cook time: 0 minutes
Total time: 5 minutes
Servings: 1
Author: Mary Mammoliti / Kitchen Confession

INGREDIENTS 

  • 1/4 Cup Balsamic Vinegar⁣

  • 2 Tbsp Extra Virgin Olive Oil⁣

  • 2 Tbsp Water⁣

  • 1 Tbsp Honey⁣

  • 1 Tbsp Dijon Mustard⁣

  • 1/2 Tsp Oregano⁣

  • 1/4 Tsp. Thyme ⁣

  • 1/2 Tsp Sea Salt⁣

  • Fresh cracked Pepper to Taste⁣

INSTRUCTIONS

  1. Combine all ingredients in a bowl

  2. Add to salads or as a sauce for your favourite sandwich

Print Friendly and PDF

Recipe: One Pot Spicy Sausage Penne

Well hello you sexy bowl of Spicy Penne and Sausage. Picture it, feel it, make it :) This ONE POT SPICY SAUSAGE PENNE PASTA is what we need on a Monday and the first day back to work after losing an hour of sleep. I’m an exhausted mess this morning. I was still awake at 11:30pm and “rave” hours for me! Then 5:30 am rolls around and I can’t find the snooze button on the alarm because he’s up and calling first dibs on the shower - love you Frank (kisses) Can we go back please? I already miss that hour. Tell me your thoughts on daylight savings time because I.JUST.CAN’T!


IMG_5722.jpeg

One Pot Spicy Sausage Penne

Prep time: 15 minutes 
Cook time: 15 minutes 
Total time: 30 minutes 
Author: Mary Mammoliti | Kitchen Confession 

Ingredients 

  • 2 tbsp olive oil

  • 4 Italian Sausage links

  • 1 onion, diced

  • 2 cloves garlic

  • 1 tsp salt

  • 1/2 tsp black pepper 

  • 1/2 to 1 tsp red chili flakes

  • 1 (796mL) can diced tomatoes

  • 1 (680mL) jar tomato purée 

  • 1 1/2 cups low sodium beef broth 

  • 1 lb dried penne rigate

Topping Options

  • Chopped fresh basil 

  • Grated Parmesan 

Instructions 

  1. In a large pot, heat 2 tbsp olive oil on med-high heat. Add turkey sausage, searing for about 2-3 minutes per side. This step maintains the shape of the sausage when slicing it in the next step.

  2. Using tongs, remove sausage and when cool, slice into bite-sized pieces. Meanwhile, add the onion to the pot and sauté for 1-2 minutes until translucent and garlic and continue to cook for about a minute or until fragrant.

  3. Add sausage pieces back into pan, add salt, pepper and red chili flakes and sauté for another 2-3 minutes. Add diced tomatoes, tomato sauce and beef broth and bring to a boil, cover, lower heat to simmer and cook for 15 minutes.

  4. Add penne to the pot, stir and cover with a lid and cook, stirring occasionally, for another 8-10 minutes until pasta is al dente - fork tender and most of the liquid is absorbed.

  5. Plate your pasta, top with a generous amount of freshly grated parmesan and fresh basil

Print Friendly and PDF

Recipe: Quick Chunky Beef Chili

When I make a dish that I love it immediately goes on repeat. Get ready to see this QUICK CHUNKY BEEF CHILI on my instastory all.winter.long. It’s hearty, packed with warm flavourful spices and it’s ready in only 30 minutes! .

.

WHAT’S YOUR GO TO DISH? 😊

IMG_9514.JPG

Quick Chunky Beef Chili

Ingredients

  • 1 1/2 pound lean ground beef

  • 2 tablespoon olive oil

  • 1 medium onion chopped

  • 2 tablespoons tomato paste

  • 1 red bell pepper, diced

  • 1 teaspoon Worcestershire sauce

  • 1 teaspoon soy sauce

  • 1 1/2 teaspoons unsweetened cocoa powder

  • 2 tablespoons chili powder

  • 1 teaspoon garlic powder

  • 1 teaspoon ground cumin

  • 1 teaspoon smoked paprika

  • 1/2 teaspoon cayenne pepper, optional

  • 1 (19 fl oz/540 ml) can red kidney beans, drained & rinsed

  • 1 (19 fl oz/540 ml) can pinto beans, drained & rinsed

  • 1 (28 fluid ounce) can fire-roasted diced tomatoes with juices

  • 1 cup beef broth * Salt & pepper to taste

toppings (optional)

  • Shredded cheddar cheese

  • Sour cream

  • Sweet Potato Tortilla Chips

Instructions

  1. Add olive oil to a large pot over medium-high heat. Sauté the onion for 5-7 minutes or until it's softened.

  2. Add the beef to the pot and cook for 5 minutes, breaking it up as you go, until brown

  3. Stir in the tomato paste, Worcestershire sauce, soy sauce, cocoa powder, chili powder, garlic powder, cumin, paprika, and cayenne pepper.

  4. Add the diced red pepper, beans and diced tomatoes, and beef broth. Increase heat to high and bring it to a gentle boil, then reduce heat and let it simmer for 20 minutes, stirring occasionally.

  5. Season with salt & pepper and serve with desired toppings and enjoy. 

Print Friendly and PDF

Recipe: Roasted Acorn Squash

Just when I thought I had finished cooking for the day this little beauty caught my eye and I just had to bake it up. Perfect addition to any meal and it’s the easiest recipe around.

FullSizeRender.jpg

ROASTED ACORN SQUASH

INGREDIENTS

  • 1 acorn squash, washed

  • 2 tbsp olive oil

  • 1 tsp garlic powder

  • Salt and pepper to taste

.

INSTRUCTIONS

  1. Preheat oven to 400°F * Cut the squash in half, using a spoon scrape out the insides, and slice into 1/2" half moons.

  2. Add the olive oil, garlic powder, salt and pepper. Toss to coat. * Lay the squash out on a baking sheet. Bake for 30 minutes until fork tender and golden in colour.


Print Friendly and PDF

Recipe: Chick Chomp Salad

We’ve all heard of TikTok but have you heard of ChickChomp? Wait! WHAT? Oh yes friends, buckle up because you are about to get BLOWN AWAY! 

This ChickChomp Salad will have you smiling and dancing with every bite. I know what your thinking “exaggerate much Mary?” And yes, yes I do but I did get you thinking about something other than the sadness and worry of our current state, am I right? 

Give your mind a break and escape into a world of colour, zing, and a whole lotta Chicka-Pow-WOW! Get your mind out of the gutter you crazy kids I’m singing the praises of CHICKPEAS! 

Who’s joining in on the #ChickChomp challenge and eating Chickpeas? Share your meals people and let’s spread the joy of food! 

IMG_8455.jpeg

Chick Chomp Salad

Total Time: 20 minutes 
Serves: 6
Author: Mary Mammoliti / Kitchen Confession

INGREDIENTS 

SALAD

  • 1 can 540ml chickpeas (about 2 1/4 cup), drained and rinsed 

  • 1 can 540ml black beans (about 2 1/4 cup), drained and rinsed 

  • 1 can flacked tuna in water, drained

  • 1 large carrot, peeled and diced 

  • 1 red bell pepper, seeded and diced

  • 3 mini cucumbers, diced

  • 3 stalks celery, diced 

  • 1/4 red onion, diced 

  • 1/3 cup feta, crumbled

DRESSING

  • 1/4 cup olive oil

  • 2 lemons, juiced 

  • 1-2 tablespoons red wine vinegar

  • 1 tablespoon Greek seasoning, plus more if needed 

  • 2 teaspoons sea salt

  • Fresh cracked pepper to taste

Note: Adjust dressing ingredients to suit personal taste

INSTRUCTIONS 

  1. Place all ingredients into a large bowl pour the dressing over, toss and serve. 

Print Friendly and PDF

Rant: Coronavirus-Stock up on these pantry items

Coronavirus (COVID19) has us all thinking of stockpiling hand sanitizer, toilet paper, and our pantries. Do we have all the shelf stable items we need for two weeks? How many cans of soup are enough? Please note, this is simply a guide and not meant to panic anyone. Let this be a resource.

Q. Should we all be stockpiling food?

The short answer is NO. If tested positive or have been in contact with someone that has been infected home quarantine or self-isolation at home would be for 14 days. I would recommend having enough food for your entire family and focus on dry and canned goods that are easy to prepare.

Q. What should we stock our pantry with for 14 days?

Keep Breakfast, Lunch and Snacks simple.

FOR BREAKFAST

Stock up on oatmeal, oats, granola, cereal and other dried grains (average out 1/2 to 1 cup per person per day), nuts and dried fruit, shelf-stable nut milks or powdered milk, protein or granola bars, and coffee and/or tea, nut/seed butters, honey

FOR LUNCH/DINNER

Make double for dinner and use leftovers for lunch; to make sure you have enough for leftovers buy enough food to double the recipes.

A few examples of good canned/boxed foods to have on hand: canned beans (chickpeas, black beans, white beans), canned tomatoes (either diced or whole), cans or jars of tomato sauce and paste, cans of pumpkin or squash puree, canned soups and canned (or boxed) broths, canned coconut milk, canned fish such as anchovies, sardines and tuna. Unopened, firm tofu and tempeh will stay fresh for weeks in the fridge and jerky are also good to have around.

Dry goods like grains, such as rice, barley, quinoa, rice, bulgur, farro) pasta, beans, oats, nuts and seeds, should be your foundation. They have a long shelf life, are easy to store

Frozen vegetables such as spinach, kale, peas, corn, edamame, spinach, kale, avocado, carrots, broccoli, cauliflower, and okra are great to have on hand, since fresh vegetables can’t be kept in an emergency supply kit without spoiling. Don’t forget your frozen fruits like berries, bananas and mango. Frozen fish, particularly shrimp and proportioned vacuum packed salmon, trout can be extremely handy if you have the room for it.

SNACKS

Include granola bars, whole grain crackers, roasted chickpeas and energy bars. Popcorn kernels and paper bags (make your own microwave popcorn or stove top)

Q. Do you have a meal plan you can share?

Plan 7 days of dinner, repeat for week 2 and double the recipe and have it for lunch the next day.

  1. Shrimp and Veggie stir-fry.

  2. Grain Bowls: Make a big batch of whatever grain you have on hand: rice, quinoa, barley, farro, etc. Heat a can of black beans and frozen corn with a little extra virgin olive oil, chicken stock and spices (or taco seasoning)

  3. Vegetables and Grains: Make a batch of quinoa or rice set aside. Sauté frozen spinach and kale with white kidney beans, in a little extra virgin olive oil, crushed red pepper and garlic.

  4. Pasta and tomato sauce or I’ll take it back to my childhood with cooked pasta and a dollop of salted butter

  5. Four Bean Salad: 2 cans of bean medley, tuna, oregano, parsley, pinch o thyme, vinegar, extra virgin olive oil

  6. Lentil soup

  7. Vegetarian Three-Bean Chili: avocado oil or olive oil, frozen corn, 1 can each of black beans, pinto beans, red kidney beans, rinsed, drained, 1 can tomato purée, 3 cups low-sodium vegetable broth, salt, ground black pepper, 1 teaspoon ground cumin, chili powder, dried oregano, 1/2 teaspoon garlic and onion powder, 1/4 teaspoon cayenne pepper. Add all ingredients to a large pot over medium-low heat and simmer for 20 minutes.

In conclusion, wash your hands with soap and water to the tune of Happy Birthday and sing it twice, don’t touch your face, and keep your hands to yourself. Say it don’t spray it, cover your mouth when coughing and sneezing. Elbow bump, hip bump, or tap toe to toe when greeting someone. Hugs are usually a warm welcome but can also bring some unwanted guests.


Print Friendly and PDF

Recipe: Almond Flour Chocolate Chip Banana Muffins

Chocolate Chip Banana Muffins, but WAIT there’s more! These are Gluten Free and No Sugar Added - WHAT-THE-SMURF! These turned out so light, moist and perfectly naturally sweetened......did I have you right after Chocolate Chip?


Step 1

IMG_4013.jpeg

Add bananas, eggs, vanilla

Step 2

IMG_4019.jpeg

Baking soda + powder, salt and blend until smooth.

Step 3

IMG_4022.jpeg

Add almond flour and process to combine. Pausing often to scrape the walls and continue to process until incorporated.

Step 4

IMG_4034.jpeg

Using a large ice cream scoop, (size 8), divide batter between 12 cups on the prepared muffin tin and bake for 25-30 minutes, or until golden brown and toothpick inserted come out clean. Remove from the oven, let cool 15-20 minutes and enjoy.


IMG_4049.jpeg

Almond Flour Chocolate Chip Banana Muffins

Prep Time: 10 minutes
Cook Time: 30 minutes
Total Time: 40 minutes
Serving: 12 muffins 
Author: Mary Mammoliti/Kitchen Confession

INGREDIENTS 

  • 3 large ripe bananas

  • 3 large eggs

  • 1 teaspoon pure vanilla extract

  • 1 teaspoon cinnamon

  • 1/4 teaspoon nutmeg

  • 1 teaspoon baking soda

  • 2 teaspoons baking powder

  • 1/4 teaspoon salt

  • 3 cups almond flour

  • 1/4 cup chocolate chips (dark or milk chocolate) 

  • Cooking spray

INSTRUCTIONS 

  1. Preheat oven to 350 degrees F and lime a muffin tin with liners and spray each liner with cooking spray. Set aside.

  2. You can use a hand mixer, blender or food processor to mix the ingredients, you choose they all work well. 

  3. Add bananas, eggs, vanilla, cinnamon, baking soda + powder, salt and process until smooth.

  4. Add almond flour and process to combine. Pausing often to scrape the walls and continue to process until incorporated.

  5. If you are using a blender or food processor scoop the batter into a bowl and add chocolate chips. Stir with a spatula.

  6. Using a large ice cream scoop, (size 8), divide batter between 12 cups on the prepared muffin tin and bake for 25-30 minutes, or until golden brown and toothpick inserted come out clean. Remove from the oven, let cool 15-20 minutes and enjoy.

NOTES

Store in a cool dry place for up to 5 days or freeze for up to 3 months.

 
Print Friendly and PDF

Recipe: Homemade Stock/Broth

Homemade Chicken Stock for the soul......and my belly.  I love making a giant pot of stock and add a little into almost every dish I make. Broth is one of those staples that you always want to have on hand in your kitchen. It adds flavor, color, and richness to your cooking. 

Here's a guide for when you can get away with stock, instead of water.

  1. Rice and Other Grains (Farro, Barley, Etc.) Use stock to cook your grains.

  2. Ragu and Pan Sauces. Add a cup to a pot of tomato sauce or to deglaze pan sauces.  After sautéing chicken breasts in a skillet, deglaze with a splash of broth or stock to loosen the bits on the bottom of the pan. Adding stock gives your sauce a rich deep flavour.

  3. Braising pot roast or short ribs in beef stock will make them more flavorful.

  4. Soups and Chili 

IMG_3928.jpeg

Homemade Stock/Broth

Prep Time: 15 minutes 
Cook Time: 1 Hour 
Total Time: 1 hour 15 minutes 
Author: Mary Mammoliti | Kitchen Confession 

Ingredients

  • 2 tablespoons olive oil

  • 1 large red onion, diced

  • 2 medium carrots, peeled and sliced into 1/2 inch rounds 

  • 2 stalks celery, chopped into 1/2 inch pieces

  • 3 cloves garlic, chopped

  • 2 cups clean vegetable scraps - optional (I used 1 leek and 1 cup mushroom stems)

  • 2 cups cherry tomatoes

  • 1 tablespoon tomato paste

  • 1 bay leaf

  • 1/2 cup fresh parsley, chopped

  • 1 sprig fresh thyme (or 1/2 teaspoon dried thyme)

  • Kosher salt to taste

  • Fresh cracked pepper to taste

  • Add the bones of a rotisserie chicken for chicken stock

  • 11 - 13 cups cold water

Instructions

  1. In a large stock pot, sauté onion, carrots, and celery in olive oil over medium/low heat and stirring often for 3-5 minutes or until onions are translucent. Add additional olive oil as needed If your vegetables begin to stick to the pan.

  2. Add garlic, cherry tomatoes, tomato past, vegetable scraps if adding them and sauté for 1 additional minute.

  3. Add remaining ingredients, top with cold water and slowly bring to just under the boiling point. Adjust heat accordingly. You do not want to boil the stock, slowly heat the mixture to ensure optimal flavour extraction from the vegetables and simmer for one hour.

  4. Add salt and pepper to taste.

  5. Remove from heat, cool slightly and strain through a fine mesh strainer, cheesecloth or nut bag. Pour into a mason jar, seal the jar and refrigerate 3 to 4 days or you can freeze it and it will last for several months.

Notes

Add a chopped parsnip, mushrooms or a leek if desired.

Print Friendly and PDF

Recipe: One Pot Chicken And Rice

Get ready for a flavour explosion! Cajun-inspired Chicken thighs cooked on top of spicy rice and beans, and this all happens in one pot! 

……… Mic Drop

Round white bowl with rice and beans topped with two chicken thighs. A couple chili peppers to the side of the bowl with a fork and spoon.

Round white bowl with rice and beans topped with two chicken thighs. A couple chili peppers to the side of the bowl with a fork and spoon.

ONE POT CHICKEN AND RICE

Prep Time: 10 minutes 
Cook Time: 45 minutes 
Total Time: 55 minutes 
Serves: 4
Author: Mary Mammoliti | Kitchen Confession 


INGREDIENTS

MARINADE:

  • 1 tsp sea salt

  • 1 tsp garlic powder

  • 1 1/2 tsp paprika

  • 1/2 tsp pepper

  • 1/2 tsp dried ground onion

  • 1/2 tsp cayenne pepper

  • 1/2 tsp oregano

  • 1/4 tsp red pepper flakes

  • 1 tsp lemon juice

  • Drizzle enough olive oil over the spices to make a wet paste

REST OF DISH:

  • 2 Tbsp Olive oil

  • 1/4 cup diced pancetta

  • 4 bone-in skin on chicken thighs

  • 1 medium yellow onion diced

  • 1 jalapeno pepper seeded and diced

  • 2 celery stalks diced

  • 1/2 tsp dried oregano

  • 1 tsp dried parsley

  • pinch of red pepper flakes

  • salt and pepper to taste

  • 1 tablespoon tomato paste

  • 1 can red kidney beans, drained and rinsed

  • 1 cup DRY long-grain rice, rinsed

  • 2 1/4 cup chicken stock or broth

  • Minced fresh parsley for garnish

INSTRUCTIONS

  1. Combine all marinade ingredients in a medium sized mixing bowl. Add chicken thighs and turn to coat. Set aside.

  2. Preheat oven to 350 degrees F.

  3. Add drizzle of olive oil to dutch oven and heat over MED-HIGH heat. Brown dices pancetta, then transfer to a plate. 3 min

  4. Add chicken thighs, skin side down, and sear for 2-3 minutes per side, to develop a nice crispy skin.

  5. Transfer chicken to plate with the pancetta.

  6. Lower heat to MED-LOW and add in chopped onion, jalapeno and celery. Saute for about 2-3 minutes, until softened.

  7. Add parsley, oregano, red pepper flakes, tomato paste, salt, pepper and stir.

  8. Add rice, red kidney beans and chicken stock, stir to combine, and let simmer for 1 minute.

  9. Nestle chicken thighs and pancettta on top of the rice (pour in the juices that are left on the plate as well). Return to a simmer, remove from heat, then cover.

  10. Bake at 350 degrees F for 35 minutes (covered).

  11. Remove the lid and bake another 10-15 minutes, until liquid is absorbed into the rice.

  12. Garnish with chopped fresh parsley and serve!

Print Friendly and PDF

Recipe: Golden Delicata Squash Soup with Roasted Garlic Chickpeas

Have you heard of the Delicata or Sweet Potato Squash?

It’s much sweeter than the other squash relatives and the taste reminds me of a mix of sweet corn, and pumpkin.

Today, I’m roasting, blending and simmering it up in my T-Fal 4qt Dutch Oven from their Stackables 10pc Set and whipping up this creamy dairy free soup!

Side note, how gorgeous is the sleek glass lid?!?! Prime real estate in my kitchen is finding a vacant shelve and this T-Fal Stackable 10pc Set has just moved in, taking up minimal space making it perfect for small space storage.

Want the recipe? Keep scrolling.

Golden Delicata Squash Soup with Roasted Garlic Chickpeas

Prep Time: 5 minutes
Cook time: 30 minutes
Total Time: 35 minutes
Serves: 2
Author: Mary Mammoliti / Kitchen Confession

INGREDIENTS

  • 1 delicata squash, cut in half and seeds removed

  • 1 large can of chickpeas (garbanzo beans), drained, rinsed and dried

  • 4 tsp olive oil, divided (plus more to caramelize the onions)

  • 1 medium yellow onion, roughly chopped

  • 3 cloves garlic, minced

  • 1 cup vegetable stock (or chicken stock)

  • 1 tbsp garlic powder

  • 1 tsp onion powder

  • 1/2 tsp cayenne

  • Salt and Pepper to taste

INSTRUCTIONS

  1. Preheat your oven to 400 degrees F.. Cut your delicata squash in half lengthwise and using a spoon scoop out the seeds. Place each half on a baking sheet, and drizzle 2 teaspoons of olive oil over top each fleshy side then sprinkle with salt and pepper. Flip each half cut side down on the baking sheet and roast for 30 minutes or until fork tender.

  2. Toss your drained, rinsed and using a paper towel pat dry the chickpeas to remove some of the moisture and pour them into a bowl. Add the remaining 2 teaspoons of olive oil, garlic powder, onion powder and cayenne until evenly coated. Spread the coated chickpeas onto another baking sheet and roast at the same time as the squash for 20 minutes., mixing the chickpeas halfway to avoid burning them.

  3. While everything is roasting in the oven, roughly chop the onion, mince the garlic. Add a generous amount of olive oil to a large skillet and cook the onions on medium to low heat until soft, fragrant and caramelized - about 5-8 minutes. Add your garlic once the onions are done and cook for a few seconds (careful not to burn). Set aside.

  4. Once your delicata squash is done roasting, let it cool for a few minutes until it’s comfortable to handle and then roughly chop it up. Add your chopped delicata squash, the onions and garlic and the vegetable stock to a heat-safe blender. Blend until creamy and smooth, adding more vegetable stock if needed.

  5. Pour the blended soup to a large pot if desired and let it simmer and heat on the stove until warmed through. Top with the roasted chickpeas and enjoy!

Print Friendly and PDF

Recipe: Creamy Broccoli Cheese Soup

Soup season has arrived and I’m here for all of the delicious bowls of heart warming meals. Every time I hear someone say Broccoli I think of Dana Carvey’s SNL Choppin' Broccoli song. If you haven’t heard it or have no idea what I’m talking about Google it. I promise you won’t be disappointed.

So, naturally I was singing it while making this Cheese and Broccoli Soup! Hey Dana, can you add Soup to the song? It could go something like this “she’s Choppin' Broccoli - AND MAKING SOUP”

Well I’m sure that won’t happen but I can tell you this did happen. Probably one of the creamiest Cheese and Broccoli Soups I’ve ever made and I’m sharing it with you today. Enjoy my friends!

PHOTO DESCRIPTION: A rich yellow soup with shredded cheddar cheese as a garnish on a white plate with a silver spoon laying beside the plate over a white and tan linen place mat.

PHOTO DESCRIPTION: A rich yellow soup with shredded cheddar cheese as a garnish on a white plate with a silver spoon laying beside the plate over a white and tan linen place mat.

Creamy Broccoli Cheese Soup

Prep time: 10 minutes
Cook time: 45 minutes
Total time: 55 minutes
AUTHOR: Mary Mammoliti / Kitchen Confession

INGREDIENTS

1 tablespoon + 4 tablespoons unsalted butter, divided
1 medium sweet yellow onion, diced
1 clove garlic, minced
1/4 cup all-purpose flour
2 cups low-sodium vegetable or chicken stock
2 cups fat-free half-and-half (regular half-and-half may be substituted; whole milk or 2% milk will work but soup won’t be as creamy)
3 cups broccoli florets, diced into bite-size pieces + 1 cups stems
2 large carrots, peeled, and sliced into very thin rounds
3/4 teaspoon salt, or to taste
3/4 teaspoon freshly ground black pepper
1/2 teaspoon smoked paprika
1/2 teaspoon dry mustard powder
pinch cayenne pepper, optional
8 ounces grated sharp cheddar cheese, with a small amount reserved for garnishing bowls

NOTE: Do not use pre-grated cheese in ziptop bags because that cheese is resistant to melting and won’t incorporate well. ⁣

DIRECTIONS

  1. In a small saucepan, add 1 tablespoon butter, the diced onion, and sauté over medium heat until the onion is soft and translucent, about 3 minutes.

  2. Stir in the garlic and cook until fragrant, about 30 seconds. Remove from heat and set the pan aside.

  3. In a large stock pot over medium heat add 4 tablespoons butter, flour, and whisk continuously for 3 minutes, or until the mixture has thickened. This is your roux.

  4. Slowly whisk the vegetable stock into the roux (flour mixture), add the cream to your pot and whisk to combine.

  5. Allow mixture to simmer over low heat for 15 minutes, or until it has reduced and thickened. TIP: Whisk intermittently to keep a creamy constancy.

  6. While the mixture is simmering, chop the broccoli and carrots and add the to the soup at the end of your simmering time of 15 minutes and add the onion and garlic you previously set aside to the pot.

  7. Add the salt, pepper, paprika, dry mustard powder, and cayenne and stir to combine, and continue to simmer over low heat for 20 to 25 minutes. Stirring occasionally to avoid burning the soup.

  8. While your soup simmers, grate the cheese and add most of the cheese at the very end of your cooking time, reserving a small amount for garnishing bowls. Stir the cheese into the soup until melted and incorporated.

  9. Transfer soup to bowls, garnish with reserved cheese, and enjoy.

    NOTE: Soup will keep refrigerated in an airtight container for 5 to 7 days.

Print Friendly and PDF

Recipe: Lemony Fresh Orzo Salad

To quote my nieces and nephew “FOMO is real” and I couldn’t agree more. It’s been so grey and rainy here in Toronto that I’m missing the sunshine. Where is it?  I bet it’s at a party! Did I miss the invite? Why hasn’t it been around? GHAAAA! I can’t take this! Let me check @instagram. I’m missing out on something great! Maybe. Umm, probably not. Who knows where it is and what it’s doing I just miss it and decided to stop obsessing. I’m taking matters into my own hands.  Did you know that adding lemon to just about any dish will give you instant sunshine? 

Give this beauty a try and let me know if it brightens up your day.

IMG_7930.jpeg

Lemony Fresh Orzo Salad

TOTAL TIME: 30 MINS
PREP TIME: 15 MINS
COOK TIME: 15 MINS
AUTHOR: Mary Mammoliti / Kitchen Confession

INGREDIENTS:

  • 12 ounces uncooked orzo

  • 2 large handfuls fresh arugula, chopped

  • 1 (15-ounce) can chickpeas (garbanzo beans), rinsed and drained

  • 1 English cucumber, diced

  • 1 cup frozen corn, thawed

  • 1 cup roughly-chopped fresh basil leaves

  • 1/2 head radicchio, roughly-chopped fresh

Lemony Dressing:

  • 2 lemons, juiced

  • 1 tablespoon rice wine or white vinegar

  • 1/2 tablespoon Dijon mustard

  • 1 garlic clove, finely minced

  • 1/2 cup olive oil

  • 1 teaspoon sea salt and freshly-cracked black pepper, to taste

  • optional: 1/2 cup crumbled feta or goat cheese

DIRECTIONS:

  1. Cook the pasta in a large stockpot of generously-salted water until al dente, according to package instructions.  Drain pasta then rinse thoroughly in a strainer with cold water until the pasta is chilled.  Transfer to a large mixing bowl.

  2. Add all the lemony dressing ingredients to a medium sized bowl and whisk for 1-2 minutes, or until the dressing begins to look creamy. Set aside.

  3. Add the remaining ingredients to the mixing bowl. , pour dressing over and toss to combine.  Taste, and season with extra salt and pepper, if needed.

  4. Serve immediately.  Or cover and refrigerate for up to 3 days.

NOTE:

If you do not use all the dressing store in a sealed jar in your fridge for up to one week.

Print Friendly and PDF